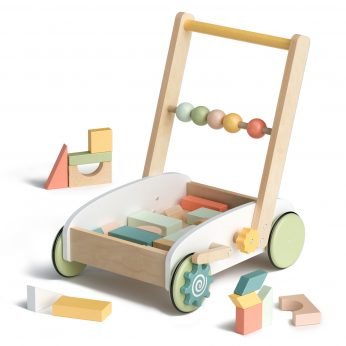
Making a wooden baby walker is an excellent way to give your baby a fun and safe way to learn how to walk. A baby walker is a simple device that provides support as your little one takes their first steps, and it can be a great addition to your child’s toy collection. While there are many different types of baby walkers available, making your own wooden walker can be a fun and rewarding project that you can complete in just a few hours.
To make a wooden baby walker, you will need some basic woodworking skills and tools. The process involves cutting and shaping pieces of wood, assembling them together, and adding wheels and a handle. There are many different designs and plans available online, and you can choose one that best fits your skill level and preferences. With some patience and attention to detail, you can create a beautiful and functional wooden baby walker that your child will love.
Table of Contents
Materials
When making a wooden baby walker, the materials used are essential to ensure the safety and stability of the finished product. Here are the main materials required to build a wooden baby walker.
Wood
The type of wood used in making a wooden baby walker is crucial. It should be strong and sturdy enough to support the weight of the baby and withstand the wear and tear of regular use. Hardwoods such as oak, maple, and birch are ideal choices because they are durable and can handle the stress of the baby’s weight. Softwoods such as pine are not recommended because they are not strong enough and can easily break.
Screws and Nails
Screws and nails are used to hold the wooden pieces together. Screws provide a stronger and more secure hold than nails, and they are easier to remove if necessary. It is recommended to use screws with a flat head to prevent any sharp edges from protruding and causing injury to the baby. Nails should be avoided as they can easily come loose and pose a hazard.
Wheels
The wheels used in making a wooden baby walker should be sturdy and durable enough to support the weight of the baby and provide smooth movement. Rubber wheels are ideal because they are non-slip and provide better traction on different surfaces. It is also recommended to use wheels with a locking mechanism to prevent the baby walker from rolling away.
Handlebar
The handlebar is an essential component of the wooden baby walker as it provides support and stability for the baby. It should be made of a strong and durable material such as metal or wood. The handlebar should also be positioned at a comfortable height for the baby to hold onto and push the walker.
In summary, the materials used in making a wooden baby walker should be carefully selected to ensure the safety and stability of the finished product. Hardwoods such as oak, maple, and birch are ideal choices for the wooden parts, while rubber wheels and screws with flat heads are recommended for the wheels and fasteners. The handlebar should be made of a strong and durable material and positioned at a comfortable height for the baby.
Tools
When making a wooden baby walker, there are several tools that are essential to have. These tools include a saw, drill, screwdriver, and sandpaper. Each tool is important for a different part of the process.
Saw
A saw is used to cut the wooden pieces to the correct length and shape. A table saw or a circular saw is recommended for this task. It is important to use a saw with a sharp blade to ensure clean and precise cuts. Safety glasses should also be worn when using a saw.
Drill
A drill is used to create holes in the wooden pieces for screws and bolts. A cordless drill is recommended for this task. It is important to use the correct size drill bit for the screw or bolt being used. A drill press can also be used for more precise drilling.
Screwdriver
A screwdriver is used to tighten screws and bolts. A cordless screwdriver is recommended for this task. It is important to use the correct size screwdriver bit for the screw being used. A manual screwdriver can also be used, but it may take longer to tighten the screws.
Sandpaper
Sandpaper is used to smooth out the rough edges of the wooden pieces. It is recommended to use sandpaper with a grit of 120 or higher for a smooth finish. A sanding block can also be used to ensure even sanding.
Overall, having these tools on hand will make the process of making a wooden baby walker much easier and efficient. It is important to use each tool correctly and safely to ensure a successful outcome.
Preparing the Wood
Before starting to build a wooden baby walker, the wood needs to be prepared properly. This section will cover the steps for cutting and sanding the wood.
Cutting the Wood
The first step in preparing the wood is to cut it to the right size. It is important to use a saw that is appropriate for the type of wood being used. A table saw or a circular saw is recommended for cutting large pieces of wood, while a jigsaw is better for cutting smaller pieces or curves.
The wood should be cut into the following pieces:
- Two sides, each measuring 18 inches by 24 inches
- One bottom piece, measuring 18 inches by 12 inches
- Two handles, each measuring 1 inch by 12 inches
It is important to measure and mark the wood carefully before cutting to ensure that the pieces are the correct size.
Sanding the Wood
After cutting the wood, the next step is to sand it to remove any rough edges or splinters. Sandpaper with a grit of 120 or 150 is recommended for this task.
The wood should be sanded in the following order:
- Start with the roughest grit of sandpaper and sand the edges of each piece of wood.
- Move on to the next grit of sandpaper and sand the entire surface of each piece of wood.
- Repeat with a finer grit of sandpaper until the wood is smooth to the touch.
It is important to wear a dust mask and eye protection while sanding to avoid inhaling sawdust or getting it in your eyes.
By following these steps for preparing the wood, the pieces will be ready for assembly into a wooden baby walker.
Assembling the Walker
Assembling a wooden baby walker involves several steps, including attaching the wheels, building the frame, and attaching the handlebar. Each step requires careful attention to detail to ensure that the walker is safe and functional for the baby.
Attaching the Wheels
The first step in assembling a wooden baby walker is to attach the wheels. This can be done using screws or bolts, depending on the design of the walker. It is important to ensure that the wheels are securely attached and able to rotate freely.
Building the Frame
Once the wheels are attached, the next step is to build the frame of the walker. This involves connecting the various pieces of wood together using screws or dowels. It is important to follow the instructions carefully and ensure that all pieces are securely attached to prevent the walker from collapsing.
Attaching the Handlebar
The final step in assembling a wooden baby walker is to attach the handlebar. This is typically done by drilling a hole in the top of the frame and inserting a dowel or metal rod. The handlebar should be securely attached to prevent it from coming loose during use.
To ensure that the walker is safe and functional, it is important to test it thoroughly before allowing the baby to use it. This includes checking the stability of the frame, the smoothness of the wheels, and the strength of the handlebar.
Overall, assembling a wooden baby walker requires careful attention to detail and a basic understanding of woodworking techniques. With the right tools and materials, anyone can create a beautiful and functional walker that will provide hours of entertainment for their little one.
Finishing Touches
When it comes to making a wooden baby walker, the finishing touches are crucial for both the look and durability of the final product. Here are some tips for staining or painting the wood and applying a sealant.
Staining or Painting the Wood
Before staining or painting the wood, it’s important to sand it down to a smooth finish. This will ensure that the stain or paint adheres evenly and looks professional. A fine-grit sandpaper (220 grit or higher) is recommended.
When choosing a stain or paint, it’s important to consider safety. Look for products that are non-toxic and safe for children. Water-based stains and paints are a good option because they are low in VOCs (volatile organic compounds) and easy to clean up.
To apply the stain or paint, use a brush or foam roller, and work in the direction of the wood grain. Apply a thin, even coat, and allow it to dry completely before applying a second coat (if necessary). Be sure to follow the manufacturer’s instructions for drying time and application.
Applying a Sealant
A sealant is important for protecting the wood from wear and tear, as well as moisture damage. There are several types of sealants available, including polyurethane, varnish, and wax.
Polyurethane is a popular choice because it is durable and easy to apply. It comes in both water-based and oil-based formulas. Varnish is another option, but it tends to be more difficult to apply than polyurethane. Wax is a natural option that provides a low-gloss finish, but it may require more frequent reapplication.
To apply the sealant, use a brush or foam roller, and work in the direction of the wood grain. Apply a thin, even coat, and allow it to dry completely before applying a second coat (if necessary). Be sure to follow the manufacturer’s instructions for drying time and application.
In conclusion, the finishing touches are an important part of making a wooden baby walker. Staining or painting the wood and applying a sealant will not only enhance the appearance of the walker but also protect it from damage. By following these tips, you can ensure that your wooden baby walker is both safe and durable for your little one to use.